No products in the cart.
Blog
Build Your Own Skateboard a Step-By-Step DIY Guide
Build your own skateboard for a fun and rewarding project where you can get creative and hands-on. Whether you’re an experienced skater or simply enjoy DIY projects, building a skateboard from scratch allows you to customize every detail. This guide will walk you through each step, from selecting sturdy maple wood and basic tools like clamps and drills to shaping and assembling your own unique board. It’s a project that not only lets you build a skateboard but also deepens your passion for skating.
How to Build Your Own Skateboard
Building your own skateboard can be an incredibly rewarding project. Whether you’re a seasoned skater or a DIY enthusiast, crafting a skateboard from scratch allows you to customize every detail to your liking. Here’s a comprehensive guide to help you through the process.

Materials and Tools Needed
Before you start building your skateboard, you’ll need to gather the essential materials and tools. Here’s a list to ensure you have everything you need:
Materials:
- Maple Veneers: High-quality maple wood is the preferred choice for skateboard decks due to its durability and flexibility.
- Wood Glue: Specialized glue for bonding the veneers together.
- Grip Tape: Provides traction on the top of the deck.
- Trucks: Metal parts that hold the wheels and attach to the deck.
- Wheels: Choose the right wheels based on your skating techniques (street, park, or cruising).
- Bearings: Fit inside the wheels and allow them to spin smoothly.
- Hardware: Bolts and nuts to attach the trucks to the deck.
Tools:
- Clamps: To hold the veneers together while the glue dries.
- Jigsaw or Bandsaw: For cutting out the deck shape.
- Drill: For making holes to attach the trucks.
- Sandpaper: To smooth the edges and surface of the deck.
- Router (optional): For shaping the edges.
- Ruler and Pencil: For measuring and marking the deck.
Step-by-Step Guide
Step 1: Prepare the Veneers Start by preparing the maple veneers. You’ll need around seven to nine layers, depending on the thickness you desire. Apply a generous amount of wood glue to each veneer and stack them together, alternating the grain direction for added strength.
Step 2: Press and Clamp the Veneers Once the veneers are glued together, place them in a skateboard press or between two sturdy pieces of wood. Use clamps to apply even pressure across the entire surface. Allow the glue to dry for at least 24 hours.
Step 3: Shape the Deck After the glue has dried, remove the veneers from the press. Use a jigsaw or bandsaw to cut out the shape of your deck. You can create your own design for a standard skateboard shape.
Step 4: Sand and Smooth Sand the edges and surface of the deck to remove any rough spots and ensure a smooth finish. Start with coarse sandpaper and gradually move to finer grits for a polished look.
Step 5: Drill Holes for the Trucks Measure and mark the positions for the truck holes. Ensure they are evenly spaced and aligned. Use a drill to create the holes, making sure they are the correct size for your hardware.
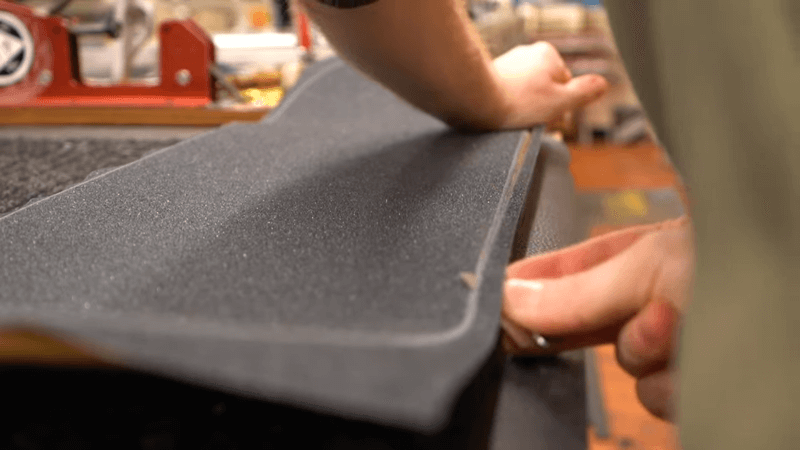
Step 6: Apply Grip Tape Cut the grip tape to fit the top of your deck. Peel off the backing and carefully apply the tape, smoothing out any air bubbles. Use a sharp knife to trim the excess tape around the edges.
Step 7: Attach the Trucks Insert the bolts through the truck holes and attach the trucks to the deck using nuts. Tighten the nuts securely, ensuring the trucks are firmly attached.
Step 8: Install Wheels and Bearings Place the bearings inside the wheels and attach them to the trucks. Make sure the wheels spin freely but are not too loose.
Step 9: Final Adjustments Double-check all the components to ensure they are secure. Adjust the tightness of the trucks to your preference.
To order your fantastic custom skateboard deck, head over to wipiskate.
How Much Does It Cost to Build Your Own Skateboard
Building your own skateboard can be a fun and fulfilling project, but it’s important to know the potential costs involved. Here’s a detailed look at the expenses you might incur, a comparison with pre-made skateboards, and some tips for keeping the costs down.
Materials:
- Maple Veneers: $20 – $40 for enough veneers to make one deck.
- Wood Glue: $5 – $10.
- Grip Tape: $5 – $10.
- Trucks: $20–$60 per pair.
- Wheels: $20 – $40 per set.
- Bearings: $10 – $30 per set.
- Hardware (bolts and nuts): $5 – $10 per set.
Tools:
- Clamps: $10 – $50 (depending on quality and quantity).
- Jigsaw or Bandsaw: $30 – $100+ (if you don’t already own one).
- Drill: $20–50 (if you don’t already own one).
- Sandpaper: $5 – $10.
- Router (optional): $50 – $150 (if you don’t already own one).
- Ruler and Pencil: $2 – $5.
Total Estimated Cost:
- Without Tools: $85 – $200.
- Including Tools: $250 – $500+ (depending on the quality and availability of tools).
Comparison with Pre-made Skateboards
Purchasing a pre-made skateboard can range from $50 for a basic model to $150 or more for a high-quality professional setup. Here’s a comparison:
- Budget Pre-made Skateboard: $50 – $100.
- Mid-range Pre-made Skateboard: $100 – $150.
- High-end Pre-made Skateboard: $150+.
Advantages of Building Your Own:
- Customization: Full control over the design, shape, and components.
- Personal Satisfaction: Sense of accomplishment from creating something with your own hands.
- Learning Experience: Gain knowledge about the mechanics and structure of skateboards.
Advantages of Pre-made:
- Convenience: No need to gather materials and tools.
- Time-saving: Ready to ride immediately.
- Warranty: Often come with a warranty against manufacturing defects.
Tips for Budget-Friendly Building
- Buy in Bulk: Purchasing materials like maple veneers and hardware in bulk can reduce costs per unit.
- Reuse Tools: If you already have some of the tools required, you can significantly cut down on expenses.
- Look for Deals: Check online marketplaces, skate shops, and hardware stores for discounts or sales on materials and tools.
- DIY Tools: For certain tools like clamps and presses, you can create DIY versions using scrap wood and basic hardware.
- Start Simple: Begin with a basic deck design to avoid the need for specialized tools like routers.
- Community Resources: Join local skateboarding or DIY groups. Members often share resources, tools, and tips.
- Quality over Quantity: Invest in quality trucks and bearings, as these significantly affect the ride quality and durability.
Safety Tips for Building a Skateboard
Building your own skateboard can be a fun and rewarding experience, but it’s essential to prioritize safety throughout the process. From personal safety gear to the safe handling of tools, following these guidelines will help ensure a safe and successful project.
Personal Safety Gear
When working with tools and materials, proper personal protective equipment (PPE) is crucial. Here’s what you need:
- Safety Glasses: Protect your eyes from wood dust, debris, and potential tool malfunctions.
- Dust Mask or Respirator: Prevent inhalation of sawdust and harmful fumes from wood glue or other chemicals.
- Ear Protection: Use earplugs or earmuffs to protect your hearing when using loud tools like saws and drills.
- Gloves: Wear gloves to protect your hands from sharp edges and splinters, but ensure they are not too loose to avoid getting caught in power tools.
- Apron or Protective Clothing: Wear an apron or old clothes to protect your skin and clothing from glue, dust, and debris.
- Closed-Toe Shoes: Ensure your feet are protected from falling tools and materials.
Specific Tool Safety
- Jigsaw or Bandsaw: Keep fingers away from the blade path, use a push stick for small pieces, and always wait for the blade to stop moving before removing cut pieces.
- Drill: Secure the material before drilling, start with a pilot hole for precision, and use the correct drill bit for the material.
- Router: Hold the router firmly with both hands, move it in the correct direction (against the rotation of the bit), and wear a dust mask to avoid inhaling fine particles.
General Safety Tips
- Take Breaks: Avoid fatigue by taking regular breaks, which helps maintain focus and reduces the risk of mistakes.
- Stay Sober: Never use tools while under the influence of alcohol or drugs.
- Emergency Plan: Have an emergency plan in place, including knowing the location of the nearest phone and emergency contact numbers.
- Buddy System: If possible, work with a friend or family member who can assist or seek help in case of an emergency.
Conclusion
Build your own skateboard and enjoy a rewarding project that combines creativity, craftsmanship, and a love for skating. From choosing high-quality maple wood to shaping and putting together your deck, each step lets you customize your skateboard just the way you like. The process requires attention to safety but gives you a great sense of achievement.
I am Jasper Thorn, a man passionate about skateboarding. My heart does kickflips and ollies with the rhythm of the wheels on concrete. Every trick, every grind, and every flip tells a story of adrenaline and freedom. I’m always out there, turning every skatepark into my playground, painting it with my awesome moves.

